Welcome! Your new Husqvarna Viking sewing machine offers incredible versatility. Access free PDF instruction manuals online for setup, maintenance, and troubleshooting guidance.
Explore resources on the official Husqvarna Viking website and connect with online communities for support. Enjoy confident sewing with detailed instructions!
Understanding Your Machine’s Model
Identifying your specific Husqvarna Viking model is crucial for accessing the correct instruction manual and support resources. Each machine, whether vintage or modern, possesses unique features and operational nuances. Locate the model number – typically found on a plate on the machine’s body, often near the power switch or bobbin area.
Once you have the model number, utilize the Husqvarna Viking official website or online forums to pinpoint the corresponding manual. These manuals provide detailed diagrams, step-by-step instructions, and troubleshooting tips tailored to your machine. Knowing your model ensures you’re utilizing the correct techniques and maximizing your sewing experience. Don’t hesitate to explore available resources!
Key Features and Benefits
Husqvarna Viking sewing machines are renowned for their innovative features and user-friendly design. The instruction manual unlocks these benefits, guiding you through advanced stitch patterns, automated functions, and customizable settings. Many models offer features like adjustable presser foot pressure and free-motion quilting capabilities.
Accessing your machine’s manual reveals how to efficiently utilize these tools, enhancing project precision and creativity. Benefits include simplified threading, automatic needle threading, and a wide range of stitch options. Detailed instructions ensure you master each feature, leading to professional-quality results and a more enjoyable sewing experience. Explore the full potential of your machine!
Getting Started: Initial Setup
Begin by carefully unpacking your Husqvarna Viking machine, referencing the instruction manual for parts inventory. Connect the power cord and foot control for initial operation.
Unboxing and Inventory of Parts
Carefully unpack your new Husqvarna Viking sewing machine, retaining the original packaging for potential future transport or warranty claims. The instruction manual is your primary guide during this process. Begin by verifying the contents against the included parts list – typically found within the manual or as a separate sheet.
Expect to find items such as various presser feet (standard, zipper, buttonhole, etc.), bobbins, needle sets, a seam ripper, screwdriver, cleaning brush, and potentially a quilting guide. Ensure all accessories are present and undamaged. Note any discrepancies immediately and contact your retailer or Husqvarna Viking support. Familiarizing yourself with each component now will streamline your sewing experience later. A thorough inventory prevents frustration and ensures you have everything needed to begin!
Attaching the Power Cord and Foot Control
Before connecting power, ensure the machine’s power switch is in the “Off” position. Locate the power socket on the back of your Husqvarna Viking sewing machine – consult your instruction manual for precise placement. Firmly insert the power cord into this socket, ensuring a secure connection. Next, connect the foot control to the designated port, usually found on the front or side of the machine.
The foot control allows for variable speed control; gentle pressure yields slower speeds, while increased pressure increases speed. Verify both connections are snug and secure before proceeding. Never operate the machine with damaged cords or a faulty foot control. Proper connection ensures safe and efficient operation, preventing potential electrical hazards.
Winding the Bobbin
Begin by placing the spool of thread onto the spool pin, securing it with a spool cap. Guide the thread through the thread guide, as illustrated in your instruction manual. Next, thread the end of the thread through the tension disc – proper tension is crucial for even winding. Attach the empty bobbin to the bobbin winder spindle.
Engage the bobbin winder by pushing it to the right. Press the foot control gently to start the winding process. Allow the bobbin to fill evenly, stopping when nearly full. Disengage the bobbin winder and remove the filled bobbin. A correctly wound bobbin ensures smooth and consistent stitching, preventing thread breakage and uneven seams.
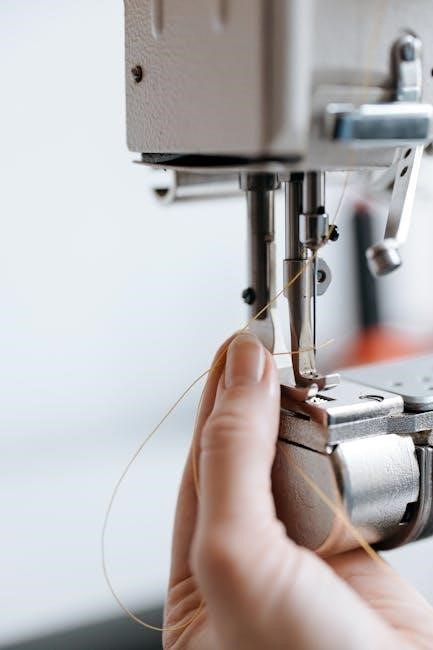
Threading the Upper Thread
Start by raising the presser foot; this opens the tension discs. Place the spool of thread on the spool pin, securing it with a cap. Follow the threading path indicated in your instruction manual, guiding the thread through the first thread guide. Next, lead the thread down and around the tension discs, ensuring it’s properly seated.
Continue threading through the take-up lever and then down to the needle. Use the needle threader if needed. Finally, thread the needle from front to back. A correctly threaded machine is vital for consistent stitch formation. Always double-check the threading path before beginning to sew.
Basic Sewing Operations
Master fundamental techniques! Select stitch patterns, adjust length and width, and practice straight and zigzag stitches for successful projects. Refer to your manual.
Selecting Stitch Patterns
Your Husqvarna Viking sewing machine boasts a diverse range of stitch patterns, detailed within your instruction manual. To select a stitch, locate the stitch selection dial or digital interface on your machine. Rotate the dial or navigate the screen to browse available options.
Stitch patterns are typically categorized – straight stitches, zigzag stitches, decorative stitches, and buttonhole stitches. The manual provides visual representations of each stitch and its recommended uses. Experiment with different stitches on scrap fabric to understand their effects before starting your project.
Remember to consult the manual for specific instructions on selecting stitches unique to your machine model. Some machines offer programmable stitch options, allowing for customization. Understanding stitch selection is crucial for achieving desired results in your sewing endeavors.
Adjusting Stitch Length and Width
Your Husqvarna Viking sewing machine’s instruction manual details how to fine-tune stitch length and width for optimal results. Locate the dedicated dials or digital controls for these adjustments. Stitch length determines the distance between stitches; shorter lengths are ideal for delicate fabrics, while longer lengths suit heavier materials.
Stitch width controls the breadth of zigzag or decorative stitches. Wider widths create bolder patterns, while narrower widths offer subtle effects. Always test adjustments on scrap fabric before sewing your project. The manual provides recommended settings for various fabrics and stitch types.
Precise adjustments ensure fabric integrity and aesthetic appeal. Refer to your manual for specific guidance related to your machine model’s controls and capabilities.
Sewing Straight Stitches
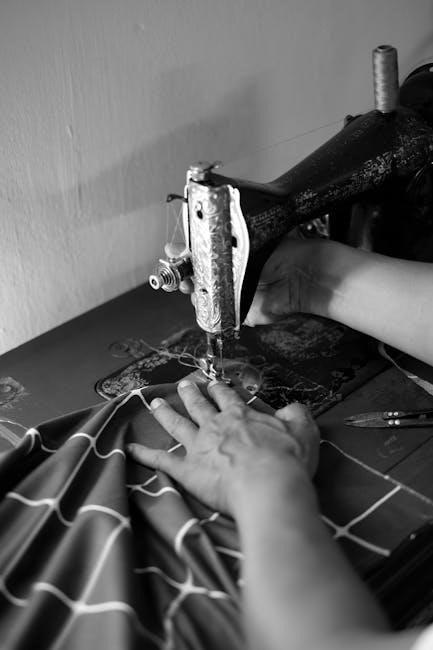
Your Husqvarna Viking sewing machine’s instruction manual guides you through achieving perfect straight stitches. Begin by selecting the straight stitch pattern on your machine. Ensure the presser foot is correctly attached and lowered before starting. Gently guide the fabric, avoiding pulling or pushing, allowing the feed dogs to advance it evenly.
Maintain a consistent seam allowance by utilizing the markings on the needle plate. A steady, moderate speed is crucial for neat, uniform stitches. Practice on scrap fabric to develop a comfortable rhythm. The manual illustrates proper fabric handling techniques.
Refer to your manual for troubleshooting tips if stitches appear uneven or skipped. Consistent practice yields professional-looking results.
Sewing Zigzag Stitches
Your Husqvarna Viking sewing machine’s instruction manual details zigzag stitch operation. Select the zigzag stitch pattern and adjust the stitch width using the designated dial – wider settings create broader zigzags. The manual explains how stitch width impacts fabric coverage and stretch.
Practice on scrap fabric to understand the effect of different width settings. Zigzag stitches are ideal for finishing raw edges, preventing fraying, and sewing stretch fabrics. Maintain a consistent fabric feed, avoiding pulling.
The manual provides guidance on adjusting stitch length for optimal results. Refer to it for troubleshooting uneven or distorted zigzag stitches. Mastering zigzag stitches expands your sewing capabilities.
Advanced Sewing Techniques
Your Husqvarna Viking manual unlocks advanced skills! Explore diverse presser feet, pressure adjustments, free-motion quilting, and buttonhole sewing for creative projects.
Using Different Presser Feet
Your Husqvarna Viking sewing machine’s versatility expands dramatically with a range of presser feet. The instruction manual details each foot’s specific purpose, ensuring optimal results for various fabrics and techniques.
A zipper foot facilitates close-stitch applications, while a buttonhole foot automates precise buttonhole creation. Explore options like the satin stitch foot for decorative sewing and the open-toe foot for enhanced visibility during free-motion work.
Refer to your manual for proper foot attachment and recommended settings. Utilizing the correct presser foot significantly impacts stitch quality and project success. Don’t hesitate to experiment and discover the unique capabilities each foot offers to elevate your sewing endeavors!
Adjusting Presser Foot Pressure
Your Husqvarna Viking sewing machine’s instruction manual explains how to adjust presser foot pressure, a crucial element for achieving even stitches; Lower pressure is ideal for delicate fabrics like silk, preventing puckering and fabric damage. Conversely, higher pressure is necessary for thicker materials like denim or multiple layers.
Incorrect pressure can lead to skipped stitches, uneven fabric feed, or thread breakage. The manual provides a dial or setting to fine-tune the pressure based on your fabric weight and type.
Always test the adjustment on a scrap piece of fabric before starting your project. Mastering this adjustment ensures consistent, professional-looking results with every stitch!
Free Motion Quilting
Your Husqvarna Viking sewing machine’s instruction manual details the process of free motion quilting, allowing for creative stitch designs. This technique involves lowering the feed dogs, enabling you to move the fabric freely under the needle. A darning foot is typically recommended for optimal visibility and movement.
The manual will guide you through setting the machine to free motion mode and adjusting stitch length and tension for best results. Practice is key to developing smooth, consistent movements.
Experiment with different patterns and thread colors to personalize your quilts. Free motion quilting unlocks a world of artistic expression!
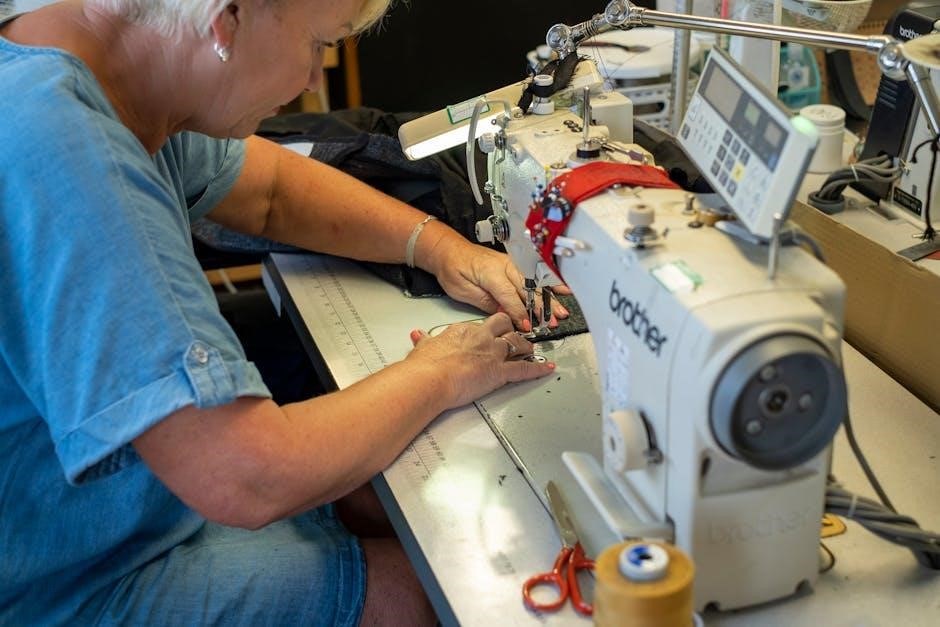
Buttonhole Sewing
Your Husqvarna Viking sewing machine’s instruction manual provides detailed steps for creating professional-looking buttonholes. It explains selecting the appropriate buttonhole foot and stitch setting for your fabric weight and button size. The manual emphasizes the importance of stabilizing the fabric to prevent distortion during the process.
Follow the guide to accurately mark the buttonhole placement on your garment. The machine automatically sews the buttonhole, including the shank, ensuring consistent results.
Practice on scrap fabric first to familiarize yourself with the settings. The manual also covers troubleshooting common buttonhole issues, like uneven stitching or puckering.
Maintenance and Troubleshooting
Refer to your Husqvarna Viking sewing machine’s manual for cleaning, oiling, and resolving common issues like thread jams or skipped stitches.
Regular upkeep ensures optimal performance!
Cleaning Your Sewing Machine
Regular cleaning is vital for maintaining your Husqvarna Viking sewing machine’s performance and longevity. Always disconnect the power before beginning any cleaning procedure. Use a soft brush or lint remover to clear away dust and fabric fibers from the bobbin area, feed dogs, and surrounding components.
A small vacuum cleaner with a brush attachment can also be helpful. Avoid using compressed air, as it can blow debris into sensitive areas. Wipe down the exterior surfaces with a slightly damp cloth. Never use abrasive cleaners or solvents, as these can damage the machine’s finish. Consult your instruction manual for specific cleaning recommendations related to your model, including any areas requiring specialized attention or lubrication. Consistent cleaning prevents build-up and ensures smooth operation.
Oiling and Lubrication
Proper lubrication ensures smooth operation and prevents wear on your Husqvarna Viking sewing machine. Refer to your instruction manual for specific oiling points, as lubrication needs vary by model. Typically, key areas include the bobbin case, hook assembly, and any moving parts identified in the manual.
Use only sewing machine oil – never use oil intended for other purposes. Apply oil sparingly, using a needle oiler for precise application; Avoid over-oiling, as excess oil can attract dust and create a sticky residue. After oiling, run the machine briefly to distribute the lubricant. Regular oiling, as recommended in your manual, will extend the life of your machine and maintain optimal performance.
Troubleshooting Common Problems
Encountering issues? Your Husqvarna Viking instruction manual is your first resource! Common problems include thread breakage, skipped stitches, and bobbin issues. Often, re-threading the machine – both upper and lower threads – resolves these. Ensure the needle is correctly inserted and of the appropriate size for your fabric.
If the machine jams, stop immediately and carefully remove the fabric. Consult the manual for specific troubleshooting steps related to your model. Online forums and the Husqvarna Viking website offer additional support. Remember to always unplug the machine before attempting any repairs beyond basic re-threading.
Replacing the Needle
A dull or damaged needle significantly impacts stitch quality. Your Husqvarna Viking instruction manual details the correct needle type and size for various fabrics. Always unplug the machine before changing the needle! Loosen the needle clamp screw, remove the old needle, and insert the new one with the flat side facing the back.
Ensure the needle is fully inserted and the clamp screw is securely tightened. Regularly replacing the needle – even if not visibly damaged – prevents skipped stitches and thread breakage. Refer to your manual for model-specific instructions and safety precautions during needle replacement.
Understanding Machine Components
Explore key parts! Your Husqvarna Viking instruction manual details the function of components like feed dogs, the bobbin case, and the handwheel for optimal sewing.
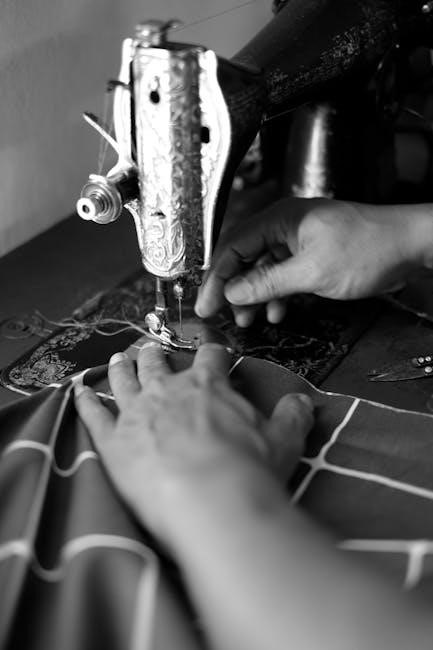
The Bobbin Case and Tension
Understanding bobbin tension is crucial for achieving balanced stitches. Your Husqvarna Viking instruction manual provides detailed guidance on properly inserting the bobbin into the case. Incorrect tension leads to looping or puckering, impacting stitch quality;
The manual illustrates how to adjust the bobbin tension screw – small changes significantly affect the stitch. It explains recognizing tension issues: loose tension causes loops on the top, while tight tension results in thread breakage.
Regularly cleaning the bobbin case, removing lint and debris, ensures smooth operation. The manual emphasizes the importance of using the correct bobbin type for your specific machine model. Proper maintenance and adjustment, as outlined in the instructions, guarantee consistent, professional-looking results.
The Feed Dogs and Their Function
Feed dogs are essential for moving fabric evenly under the needle, creating consistent stitches. Your Husqvarna Viking instruction manual details their location and operation. These toothed metal pieces grip and advance the fabric with each stitch cycle.
The manual explains how to raise or lower the feed dogs, a crucial function for techniques like free-motion quilting or darning. Lowering them disengages the fabric feed, allowing complete control. Understanding their function is vital for various sewing projects.
Regular cleaning, removing lint buildup, ensures smooth fabric movement. The instruction manual highlights potential issues – uneven feeding can cause puckering. Proper maintenance, as described in the instructions, guarantees consistent and professional sewing results.
The Handwheel and Flywheel
The handwheel, a large wheel on the right side of your Husqvarna Viking, allows manual control of the needle. Your instruction manual emphasizes its use for precise starting and stopping, especially during intricate work. Turning it clockwise lowers the needle; counterclockwise raises it.
Connected to the flywheel, it converts rotational motion into the up-and-down movement of the needle. The manual cautions against forcing the handwheel, as it could damage internal components. It’s vital for tasks like carefully positioning the needle or hand-cranking through thick fabrics.
Always refer to your instruction manual for specific guidance on handwheel operation. Understanding its function enhances control and prevents potential machine damage, ensuring a smooth and efficient sewing experience.
Finding Manuals and Support
Download free PDF instruction manuals for your Husqvarna Viking sewing machine instantly! Explore the official website and online forums for assistance.
Downloading Free PDF Manuals
Accessing your Husqvarna Viking sewing machine’s manual is now easier than ever! Numerous online resources offer free PDF downloads, providing comprehensive instructions for setup, operation, and maintenance. Several websites specialize in archiving vintage and modern sewing machine manuals, including those for Husqvarna Viking.
Simply search online for “Husqvarna Viking sewing machine manual” followed by your specific model number. You’ll find links to downloadable PDFs, often hosted on dedicated manual websites or archive.org. These manuals cover everything from initial setup – like unboxing and threading – to advanced techniques and troubleshooting common issues.
Downloading the PDF allows you to keep a digital copy readily available on your computer, tablet, or smartphone, ensuring you always have access to helpful instructions whenever you need them. Don’t hesitate to utilize these valuable resources!
Husqvarna Viking Official Website Resources
The official Husqvarna Viking website is your primary destination for comprehensive support regarding your sewing machine. It provides a dedicated section for manuals, allowing you to search by model number to instantly locate the correct PDF instruction manual. Beyond manuals, the website offers a wealth of resources, including helpful videos demonstrating various sewing techniques and machine features.
Explore their “Support” section for FAQs, troubleshooting guides, and access to a knowledge base addressing common user inquiries. You can also register your machine for warranty information and exclusive updates. The website frequently features creative projects and inspiration to help you maximize your sewing experience.
Utilizing these official resources ensures you receive accurate and up-to-date instructions and support directly from the manufacturer.
Online Forums and Communities
Engage with fellow Husqvarna Viking enthusiasts in vibrant online forums and communities! These platforms offer a collaborative space to ask questions, share tips, and troubleshoot issues related to your sewing machine. Many experienced users readily share their knowledge and insights, often providing solutions not found in the official instruction manual.
Search online for dedicated Husqvarna Viking groups on platforms like Facebook, or explore sewing-specific forums. You can find discussions on specific models, advanced techniques, and even modifications. These communities are invaluable for learning from others’ experiences and gaining practical advice.
Remember to be specific when posting questions, including your machine model number for targeted assistance.
Safety Precautions
Always prioritize safety! Review the instruction manual for general, electrical, and needle safety guidelines before operating your Husqvarna Viking sewing machine.
General Safety Guidelines
Before beginning any sewing project, carefully read the entire instruction manual for your Husqvarna Viking sewing machine. This ensures a thorough understanding of its operation and safety features. Always disconnect the machine from the power source when changing the needle, threading, or performing any maintenance.
Keep fingers away from the needle while sewing. Never pull fabric while the machine is running; instead, gently guide it. Avoid sewing over pins, as they can damage the needle and machine. Ensure the area around the machine is well-lit and free of clutter.
Supervise children closely when they are near the sewing machine. Never leave the machine unattended while it is plugged in. Regular maintenance, as outlined in the manual, contributes to safe operation.
Electrical Safety
Always verify that the voltage indicated on the sewing machine’s nameplate matches your household voltage before plugging it in. Use a properly grounded outlet to prevent electrical shock. Never operate the machine with a damaged power cord or plug; replace them immediately.
Avoid using extension cords if possible. If one is necessary, ensure it’s appropriately rated for the machine’s power consumption. Do not expose the machine to moisture or operate it with wet hands. Disconnect the machine from the power source before cleaning or performing any maintenance.
Never attempt to repair the machine yourself; contact a qualified service technician for repairs. Following these electrical safety guidelines will ensure safe operation and prevent potential hazards.
Needle Safety
Always disconnect the power supply before changing the needle to prevent accidental activation. Use only needles specifically designed for your Husqvarna Viking sewing machine and the fabric you are sewing. Insert the needle correctly, with the flat side facing the back.
Never sew over pins or attempt to sew through thick materials that could bend or break the needle. A broken needle can cause injury and damage the machine. Dispose of used needles responsibly in a sharps container to avoid accidental pricks.
Regularly inspect the needle for damage, such as bending or dullness, and replace it as needed. Prioritizing needle safety ensures both your well-being and the longevity of your machine.