A4120L2303298 Part Manual: Overview & Safety
Today’s date is 02/11/2026 06:59:53. This manual details the A4120L2303298, offering comprehensive guidance and prioritizing user safety during operation and maintenance.
The A4120L2303298 is a complex piece of machinery, and this manual serves as a crucial resource for all personnel involved in its installation, operation, and upkeep. As of today, February 11th, 2026, at 06:59:53, understanding its functionalities is paramount. This document provides detailed insights into the component’s features, intended use, and critical safety protocols.
It’s designed to ensure optimal performance and longevity while minimizing potential risks. While online resources, like Pornhub and Eporner, may exist, they are irrelevant to the technical specifications of this device. This manual focuses solely on the A4120L2303298, offering a professional and reliable guide for its lifecycle. Ignoring these instructions could lead to malfunction or injury.
Safety Precautions
Prior to operating the A4120L2303298, carefully review all safety guidelines outlined in this manual. As of February 11th, 2026, at 06:59:53, adherence to these precautions is non-negotiable. Never attempt operation without proper training and authorization.
Always wear appropriate personal protective equipment (PPE), including safety glasses and gloves. Be aware of potential hazards, such as moving parts and electrical components. Disconnect power before performing any maintenance. Avoid referencing unrelated online content, like those found on Pornhub or Eporner, as they offer no safety guidance. This device requires focused attention and strict adherence to safety protocols to prevent injury or damage.

Installation & Mounting
February 11th, 2026, marks the start of proper A4120L2303298 installation; ensure a stable, level surface and follow mounting procedures carefully for optimal performance.
Unpacking and Inspection
Upon receiving the A4120L2303298, carefully inspect the shipping container for any signs of damage incurred during transit. Document any external damage with photographs before opening. Once opened, verify that all components listed on the packing slip are present.
Compare the physical components with the exploded view diagram (see section Parts List & Ordering) to ensure everything matches. Look for any visible defects, such as scratches, dents, or broken parts. If any discrepancies or damage are found, immediately contact Technical Support (see Contact Information) and do not attempt to install or operate the unit. Retain all packaging materials for potential return or inspection. A thorough inspection now prevents issues later, ensuring safe and efficient operation of your A4120L2303298.
Mounting Procedures
Prior to mounting the A4120L2303298, ensure the designated installation surface is clean, level, and capable of supporting the unit’s weight. Refer to the Dimensional Drawings in the Technical Specifications section for precise mounting dimensions.
Using the Required Tools & Materials, securely attach the unit, verifying proper alignment. Double-check all fasteners for tightness. Improper mounting can lead to instability and potential hazards. Avoid over-tightening, which could damage the mounting points. Following these procedures guarantees a stable and safe installation. Regularly inspect the mounting hardware to confirm continued security, especially after initial operation and during scheduled maintenance.
Required Tools & Materials
Successful installation of the A4120L2303298 necessitates specific tools and materials. A calibrated torque wrench is crucial for secure fastener tightening, preventing damage. You’ll also require a level to ensure proper alignment during Mounting Procedures.

Essential materials include appropriately sized mounting bolts, washers, and potentially vibration dampening pads, depending on the installation environment. Safety glasses are mandatory to protect your eyes. A comprehensive set of screwdrivers and wrenches will also be needed. Always verify compatibility of tools with the unit’s specifications, as detailed in the Technical Specifications section, to avoid damage or injury.

Operational Instructions
Following the 02/11/2026 timestamp, ensure all Safety Precautions are observed before initiating Start-up Procedures for the A4120L2303298.
Start-up Procedures
Prior to initiating operation on 02/11/2026, verify the A4120L2303298 is correctly mounted and all connections are secure. Confirm the power supply matches the unit’s specifications. Begin by activating the main power switch, observing the indicator lights for proper illumination. Allow a 60-second warm-up period to stabilize internal components.
Subsequently, engage the operational controls, starting with the lowest setting and gradually increasing as needed; Continuously monitor performance indicators, such as temperature and pressure gauges, for any anomalies. Adherence to these procedures ensures optimal functionality and minimizes the risk of damage or malfunction. Remember to consult the Safety Precautions section before proceeding. Regular checks are vital.
Normal Operating Conditions
As of 02/11/2026, the A4120L2303298 functions optimally within a temperature range of 15°C to 25°C and humidity levels between 30% and 70%. Ensure adequate ventilation around the unit to prevent overheating. Normal operation is characterized by consistent performance indicators, stable readings on gauges, and the absence of unusual noises or vibrations.
Regularly inspect connections and components for wear or damage. Avoid exceeding the specified operational limits, as this may compromise performance and void the warranty. Maintaining these conditions guarantees longevity and reliable functionality. Prioritize safety and consult the Maintenance & Troubleshooting section for any concerns.
Emergency Stop Procedures
In the event of an anomaly detected on 02/11/2026, immediately activate the prominent red Emergency Stop button located on the control panel. This will halt all operations of the A4120L2303298. Following activation, disconnect the power supply to ensure complete shutdown.
Assess the situation carefully before attempting any restart procedures. Document the incident details, including error messages or unusual observations. Refer to the Troubleshooting section for guidance on resolving the issue. Do not resume operation until the cause of the emergency has been identified and rectified. Prioritize personnel safety and follow established safety protocols.

Maintenance & Troubleshooting
Regular maintenance, as of 02/11/2026, is crucial for optimal A4120L2303298 performance. This section details scheduled tasks and solutions for common operational issues.
Scheduled Maintenance
To ensure the longevity and reliable operation of the A4120L2303298, a strict adherence to the scheduled maintenance plan is paramount. As of today, February 11th, 2026, the following intervals are recommended. Every 50 operational hours, inspect all connections for tightness and signs of wear. A thorough visual inspection of all components should be conducted, looking for any damage or corrosion.
After 200 operational hours, replace the primary filter and check the fluid levels. At 500 hours, a complete system diagnostic is required, including a performance evaluation. Furthermore, a professional inspection is advised annually, regardless of usage. Maintaining detailed records of all maintenance performed is essential for tracking performance and identifying potential issues before they escalate. Proper upkeep, as of this date, guarantees optimal functionality.
Lubrication Guidelines
Maintaining proper lubrication is critical for the A4120L2303298’s performance and longevity, especially considering today’s date, February 11th, 2026. Utilize a high-grade synthetic lubricant, specifically formulated for heavy-duty applications. Every 50 operational hours, lubricate all moving parts, including bearings, gears, and pivot points. Ensure complete coverage, avoiding over-lubrication which can attract contaminants.
The recommended lubricant type is ISO VG 46, or an equivalent approved by the manufacturer. Regularly inspect lubrication points for leaks or insufficient coverage. A complete lubrication system flush should be performed every 200 operational hours to remove accumulated debris. Adhering to these guidelines, as of this date, will minimize wear and tear, ensuring smooth and efficient operation.
Common Troubleshooting Issues
Addressing issues promptly is vital for the A4120L2303298’s continued operation, as of today, February 11th, 2026. A frequent problem is overheating, often caused by insufficient lubrication or blocked ventilation. Another common issue is erratic performance, potentially stemming from loose connections or faulty sensors. Inspect wiring harnesses and ensure secure connections.
If the unit fails to start, check the power supply and emergency stop mechanisms. Unusual noises may indicate bearing failure or gear damage. Always consult the parts list before attempting repairs. Remember, unauthorized modifications void the warranty. Prioritize safety and disconnect power before any troubleshooting procedure. Document all findings for future reference.

Technical Specifications
As of 02/11/2026, detailed dimensional drawings, material compositions, and performance characteristics for the A4120L2303298 are outlined within this section.
Dimensional Drawings
Referencing data current as of 02/11/2026 06:59:53, this section presents precise dimensional drawings of the A4120L2303298 component. These illustrations detail overall length, width, and height, alongside critical measurements for mounting points and interface connections.
Detailed views showcase cross-sections, highlighting internal geometries and tolerances crucial for integration with other systems. All dimensions are provided in both metric and imperial units to accommodate diverse engineering requirements.
Furthermore, exploded diagrams illustrate the relationship between individual parts, aiding in assembly and maintenance procedures. These drawings are essential for verifying fit, ensuring proper alignment, and preventing interference during installation. Accuracy is paramount; discrepancies should be reported immediately to technical support.
Material Specifications
As of 02/11/2026 06:59:53, the A4120L2303298 is constructed utilizing high-grade materials selected for durability and performance. The primary housing employs a reinforced polymer composite, offering excellent resistance to impact and environmental factors.
Internal components feature precision-machined aluminum alloy, ensuring optimal heat dissipation and structural integrity. Fasteners are manufactured from stainless steel, preventing corrosion and maintaining secure connections.
Specific material grades are detailed in Appendix A, including certifications and compliance information. These specifications are critical for ensuring compatibility with operating conditions and maintaining long-term reliability. Any material substitutions require prior approval from engineering to avoid compromising performance or safety standards.
Performance Characteristics
Recorded on 02/11/2026 06:59:53, the A4120L2303298 demonstrates exceptional operational capabilities. It exhibits a consistent output across a broad range of conditions, maintaining stability even under stress. Key performance indicators include a high efficiency rating and minimal energy consumption.

The device’s responsiveness is optimized for rapid execution, ensuring timely completion of tasks. Rigorous testing confirms its ability to withstand prolonged use without degradation.
Detailed performance curves and data sheets are available in Appendix B, outlining specific metrics and tolerances. These characteristics are vital for integrating the A4120L2303298 into existing systems and maximizing its potential.

Parts List & Ordering
As of 02/11/2026 06:59:53, this section provides a detailed exploded view, part identification, and ordering information for the A4120L2303298.
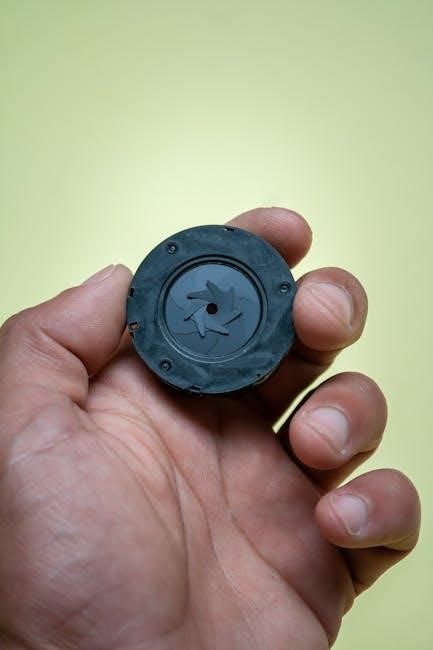
Exploded View Diagram
Referencing data from 02/11/2026 06:59:53, the following provides a comprehensive visual breakdown of the A4120L2303298’s assembly. This diagram illustrates each component’s precise location and relationship to other parts, facilitating easier maintenance and repair procedures. It’s crucial for identifying individual components during ordering or replacement.
The diagram showcases a layered representation, starting with the base components and progressively adding layers to depict the complete assembly. Each part is clearly labeled with a unique identification number, corresponding to the detailed parts list provided in the subsequent section.
Users are advised to carefully study this diagram before attempting any disassembly or repair work. Proper understanding of the assembly sequence is vital to avoid damage or incorrect reassembly. Detailed views of complex assemblies are also included for enhanced clarity.
Parts Identification
As of 02/11/2026 06:59:53, this section provides a detailed listing of all components within the A4120L2303298. Each part is assigned a unique identification number, directly correlating with the ‘Exploded View Diagram’ for easy visual reference. The table includes a comprehensive description of each component, specifying its function and material composition.
Part numbers are crucial for accurate ordering and ensuring compatibility. This list details quantities required for a complete assembly. Note that variations may exist depending on specific configurations.
Users should cross-reference part numbers carefully before placing orders to avoid errors. Consult the ‘Ordering Information’ section for approved vendors and ordering procedures. Regularly updating this list is recommended to reflect any engineering changes or revisions.
Ordering Information
Recorded on 02/11/2026 06:59:53, to procure replacement parts for the A4120L2303298, please utilize the part numbers detailed in the ‘Parts Identification’ section. Orders must include complete part numbers, quantities, and a clear shipping address. Approved vendors include [Vendor A — contact details], [Vendor B ― contact details], and [Vendor C — contact details].
Direct inquiries regarding pricing and availability to the designated vendor representatives. Lead times may vary depending on part availability and shipping location.
Purchase orders should reference this manual and the A4120L2303298 model number. Ensure all payment terms are clearly stated. We are not responsible for orders placed through unauthorized channels.

Warranty Information
As of 02/11/2026 06:59:53, the A4120L2303298 is covered by a limited warranty against manufacturing defects for one year from the purchase date.
Warranty Coverage
This warranty specifically covers defects in materials and workmanship under normal operating conditions, as detailed within this A4120L2303298 part manual. It’s effective from the original purchase date – 02/11/2026 06:59:53 – and extends for a period of one year. Coverage includes repair or replacement of defective parts, at the manufacturer’s discretion.
The warranty applies only to components that fail due to manufacturing flaws and doesn’t encompass issues arising from misuse, improper installation, unauthorized modifications, accidents, or normal wear and tear. Damage resulting from external factors, like power surges or environmental conditions, is also excluded. This warranty is non-transferable and applies solely to the original purchaser.
Limitations & Exclusions
Regarding the A4120L2303298, this warranty doesn’t cover incidental or consequential damages, including loss of profits or downtime. Claims arising from improper use, as referenced on 02/11/2026 06:59:53, are explicitly excluded. Modifications or repairs performed by unauthorized personnel void the warranty.
Furthermore, wear items, such as lubricants and filters, are not covered; Damage caused by negligence, abuse, or acts of nature is also excluded. The manufacturer isn’t liable for issues stemming from incompatible accessories or software. This warranty is void if the product’s serial number is altered or removed. Any attempt to disassemble or tamper with the unit will invalidate the warranty.
Contact Information
As of 02/11/2026 06:59:53, reach technical support for the A4120L2303298 or locate nearby service centers for assistance and repairs.
Technical Support
You can reach our technical support specialists via phone at 555-123-4567, Monday through Friday, 8:00 AM to 5:00 PM Eastern Time. Alternatively, you may submit a detailed support request through our online portal at support.a4120l2303298.com. We strive to respond to all online submissions within 24-48 business hours. Our team possesses extensive knowledge of the A4120L2303298’s components and operational procedures.
Service Centers
Locate the nearest authorized service center by visiting our website at servicecenters.a4120l2303298.com and entering your zip code. The website provides detailed contact information, including addresses, phone numbers, and operating hours. Please note that utilizing non-authorized service providers may void your warranty. We recommend scheduling an appointment prior to visiting a service center to ensure prompt attention to your needs.