Dyna-Glo Kerosene Heater Manual: A Comprehensive Guide
This manual details setup, operation, maintenance, and troubleshooting for Dyna-Glo kerosene heaters, including model RMC-95C6B, and Duraheat compatibility.

Understanding Your Dyna-Glo Kerosene Heater
Dyna-Glo kerosene heaters provide efficient, portable warmth, ideal for spaces without central heating. These heaters utilize kerosene as fuel, offering substantial heat output. Familiarizing yourself with the heater’s components – fuel tank, wick assembly, and control panel – is crucial for safe and effective operation. Understanding the electrical system, if present, including the fuse box, is also important.
Proper ventilation is paramount, as these heaters produce combustion byproducts. This guide will cover everything from initial fueling to advanced maintenance, ensuring optimal performance and longevity.
Safety Precautions
Dyna-Glo kerosene heaters require strict adherence to safety guidelines. Never operate the heater in enclosed spaces without adequate ventilation to prevent carbon monoxide buildup – a potentially fatal hazard. Keep flammable materials well clear of the heater’s vicinity. Always ensure the heater is placed on a stable, level surface.
Regularly inspect for fuel leaks and never refuel the heater while it’s operating or still hot. Children and pets should be supervised around the heater at all times.
Important Safety Warnings
This heater generates intense heat; avoid direct contact. Never leave a lit heater unattended, and always extinguish it before leaving the room or going to sleep. Use only Kerosene fuel – other fuels can cause fires or explosions. Ensure proper ventilation to prevent carbon monoxide poisoning, which can be deadly.
Do not modify the heater in any way. Improper modifications can create safety hazards. Keep the area around the heater clear of combustible materials like paper or curtains.
Carbon Monoxide Risks & Prevention
Kerosene heaters produce carbon monoxide (CO), an odorless, colorless, and deadly gas. Symptoms of CO poisoning include headache, dizziness, nausea, and confusion. Install a CO detector near the heater and ensure it’s functioning correctly. Proper ventilation is crucial; use in a well-ventilated area.
Never use the heater in a confined space like a sleeping room without adequate airflow. Regularly inspect the heater for proper combustion and any signs of malfunction.
Heater Components & Identification
Understanding your Dyna-Glo heater’s parts is essential for safe operation and maintenance. Key components include the fuel tank, wick assembly, control panel, and igniter (if equipped). The fuel tank stores kerosene, while the wick draws fuel for combustion.
The control panel manages heat output. Familiarize yourself with each part’s location and function before use. Refer to diagrams for precise identification of components within your specific model.
Fuel Tank Overview
The Dyna-Glo kerosene heater’s fuel tank is designed for safe and efficient kerosene storage. It features a capacity suitable for extended operation, typically around 1.3 gallons for models like the RMC-95C6B. Always check the tank capacity specified for your particular model.
Inspect the tank regularly for any signs of damage or leaks. Ensure the fuel cap seals tightly to prevent spills and evaporation. Never overfill the tank, leaving space for expansion.

Wick Assembly Details
The wick assembly is crucial for proper fuel vaporization and flame control in your Dyna-Glo heater. It consists of a tightly woven wick that draws kerosene upwards via capillary action. Regularly inspect the wick for wear, carbon buildup, or damage.
A properly primed wick ensures a consistent flame. Replacement wicks, like the Duraheat Dh145, are readily available. Ensure the wick is correctly seated within the assembly for optimal performance and safety.
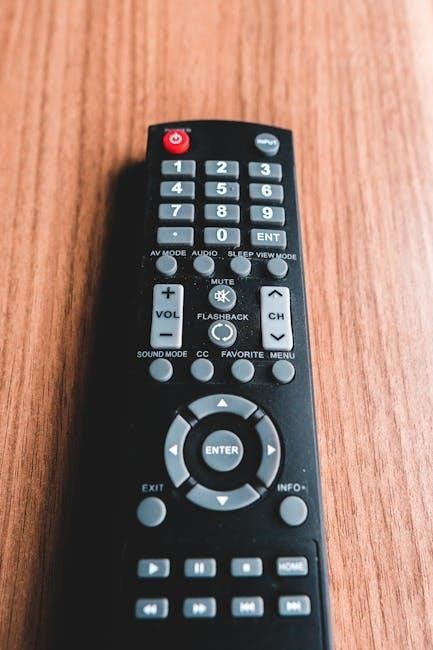
Control Panel Functions
The control panel governs heat output and safety features of your Dyna-Glo kerosene heater. Typically, a rotary dial adjusts the fuel flow to the wick, controlling flame height and BTU output. Some models feature a safety shut-off switch, automatically extinguishing the flame if tipped.
Familiarize yourself with each control’s function before operation. Understanding these controls ensures efficient heating and prevents accidental operation or hazards.
Setting Up Your Heater
Proper setup is crucial for safe and efficient operation of your Dyna-Glo kerosene heater. Begin with the initial fueling procedure, carefully filling the tank with recommended kerosene, avoiding overfilling. Next, prime the wick according to instructions, ensuring adequate fuel saturation for ignition.
Finally, position the heater on a level, non-combustible surface with sufficient ventilation, adhering to specified clearance requirements.
Initial Fueling Procedure
Before first use, carefully fill the fuel tank with 1-K kerosene. Ensure the heater is cool and on a protected surface. Slowly pour kerosene into the tank, using a funnel to prevent spills, and do not exceed the maximum fill line.
Avoid using fuels other than 1-K kerosene, as this can cause malfunctions or safety hazards. Wipe up any spilled fuel immediately with a clean cloth.
Wick Priming Instructions
Proper wick priming is crucial for initial heater lighting and consistent performance. After fueling, allow the wick to fully saturate with kerosene for at least 20-30 minutes. This ensures complete absorption and prevents dry combustion.
Gently raise the wick using the control knob, observing the kerosene absorption. Avoid raising it too high initially, as this can cause smoking. A fully primed wick will exhibit a consistent, dark kerosene saturation.
Placement & Ventilation Requirements
Safe operation demands careful heater placement and adequate ventilation. Position the heater on a level, non-combustible surface, at least 3 feet away from walls, furniture, and flammable materials. Ensure sufficient airflow to prevent carbon monoxide buildup.
A room with at least 100 square feet of space is recommended. Always crack a window slightly to provide fresh air circulation, even during operation. Never use the heater in airtight spaces.
Operating Instructions
Proper operation ensures efficient heating and safety. After priming the wick (refer to the Wick Priming Instructions section), carefully light the heater following the step-by-step lighting procedure. Begin with the lowest heat setting and gradually adjust as needed.
Monitor fuel consumption regularly to avoid running the tank dry. Never leave a lit heater unattended, and always extinguish it completely before leaving or sleeping.
Lighting the Heater – Step-by-Step
Ensure proper ventilation before lighting. First, confirm the fuel tank has sufficient kerosene. Next, turn the fuel control knob to the “Light” position. Carefully apply a flame to the wick, holding a lit match or lighter near it until it ignites.
Allow the flame to stabilize for a minute before adjusting the heat output. If it doesn’t light, repeat the process, ensuring the wick is properly primed.
Adjusting Heat Output Levels
Once lit, use the control panel to adjust heat. Rotate the heat control knob clockwise for higher output and counterclockwise for lower. Observe the flame; a larger flame indicates greater heat. Start with a lower setting and gradually increase it to your desired comfort level.
Regular adjustments ensure efficient fuel consumption and prevent overheating. Monitor the heater closely during initial adjustments.
Monitoring Fuel Consumption
Regularly check the fuel tank’s sight gauge to monitor kerosene levels. Note how long a full tank lasts at different heat settings to estimate consumption. Higher heat settings will deplete fuel faster. Avoid letting the tank run completely dry, as this may require re-priming the wick.
Consistent monitoring helps plan refueling and ensures uninterrupted heating. Keep a log of fuel usage for accurate estimations.
Maintenance & Care
Consistent maintenance extends your Dyna-Glo heater’s lifespan and ensures optimal performance. Regularly replace the wick as needed – a worn wick reduces efficiency. Clean the fuel tank annually to prevent sediment buildup and maintain clean fuel flow. Wipe down the exterior with a damp cloth to remove dust.
Proper care guarantees safe and efficient operation, preventing potential issues and maximizing heating capacity.

Wick Replacement Guide
Replacing the wick is crucial for maintaining optimal heater performance. First, ensure the heater is completely cool and the fuel tank is empty. Carefully remove the old wick, noting its orientation. Install the new Duraheat DH145 wick, ensuring it fits snugly within the wick holder.
Proper wick priming, as detailed in the operating instructions, is essential for initial lighting and consistent flame production. A new wick ensures clean, efficient burning.
Fuel Tank Cleaning Procedures
Regular fuel tank cleaning prevents sediment buildup and ensures optimal heater function. Begin by completely emptying the fuel tank. Carefully inspect the tank for any rust or debris. Use a siphon to remove remaining kerosene, disposing of it properly. Rinse the tank with fresh kerosene, swirling to loosen particles.
Repeat until the rinse is clear, then allow the tank to air dry completely before refueling. Avoid using water or harsh chemicals.

Exterior Cleaning & Polishing
Maintaining a clean exterior enhances your Dyna-Glo heater’s appearance and prevents corrosion. Begin by disconnecting the heater from any power source. Wipe down the exterior surfaces with a soft, damp cloth and mild detergent. Avoid abrasive cleaners that could scratch the finish.
For polished surfaces, use a dedicated metal polish to restore shine. Dry thoroughly with a clean cloth. Regular cleaning prevents dust and grime accumulation.
Troubleshooting Common Issues
Encountering problems with your Dyna-Glo heater? This section addresses frequent concerns. If the heater won’t light, check fuel levels, wick height, and igniter functionality. A weak flame often indicates a low fuel supply or a wick needing replacement.

Unusual odors suggest contaminated fuel or incomplete combustion – ventilate the area immediately. Always prioritize safety and consult a qualified technician if issues persist.
Heater Won’t Light – Diagnosis
If your Dyna-Glo heater fails to ignite, begin by verifying sufficient kerosene in the fuel tank. Next, ensure the wick is correctly primed and at the proper height. Inspect the igniter – if equipped – for functionality, checking for power if applicable.
A clogged wick or contaminated fuel can also prevent ignition. Thoroughly examine these components before seeking further assistance.
Weak Flame – Possible Causes
A diminished flame output on your Dyna-Glo heater often indicates insufficient fuel reaching the wick. Confirm adequate kerosene levels and a properly primed wick, adjusted to the correct height. Contaminated or low-quality kerosene can also restrict fuel flow, resulting in a weak burn.
Inspect the wick for wear or carbon buildup, potentially requiring replacement. Ensure proper ventilation isn’t excessively drawing heat away.
Unusual Odors – What to Do
Detecting strange smells from your Dyna-Glo heater demands immediate attention. A kerosene odor suggests a potential leak – extinguish the heater and inspect fuel lines, the tank, and connections. A burning smell could indicate unburnt fuel or foreign material on the wick.

Ensure adequate ventilation and never operate the heater in enclosed spaces. If odors persist, discontinue use and contact customer support for assistance.
Fuel Considerations
Optimal performance relies on using the correct kerosene grade. Recommended types include 1-K kerosene, ensuring it’s free from contaminants. Store fuel in approved containers, away from heat sources and direct sunlight, following all safety regulations.
Avoid using gasoline, diesel, or other fuels, as they pose significant fire hazards; Regularly inspect stored fuel for water or sediment, discarding any compromised kerosene to maintain heater efficiency and safety.
Recommended Kerosene Types
For Dyna-Glo heaters, 1-K kerosene is the specifically recommended fuel type, ensuring clean burning and optimal heater performance. This grade meets stringent purity standards, minimizing soot and odor. Avoid using fuels not designated as kerosene, such as gasoline or diesel fuel, due to extreme flammability risks.
Using improper fuels can damage the heater and void the warranty. Always verify the kerosene’s grade before filling the tank, prioritizing safety and longevity of your heating appliance.
Safe Fuel Storage Practices
Store kerosene in a clearly labeled, non-glass container specifically designed for flammable liquids, away from living areas and heat sources. Keep containers tightly sealed to prevent vapors from escaping and potential fire hazards. A cool, well-ventilated outdoor location, like a shed or garage, is ideal.
Never store kerosene near appliances or anything with an open flame. Adhere to local regulations regarding flammable liquid storage, ensuring compliance and safety for you and your surroundings.
Avoiding Contaminated Fuel
Using clean, fresh kerosene is crucial for optimal heater performance and safety. Avoid fuel that appears cloudy, discolored, or contains visible sediment. Water contamination is a significant concern, leading to inefficient burning and potential corrosion. Always purchase kerosene from reputable suppliers and store it properly to prevent contamination.
Regularly inspect your fuel supply and discard any questionable kerosene. Contaminated fuel can damage the wick and heater components, voiding the warranty.
Electrical System (If Applicable)
Some Dyna-Glo kerosene heater models feature an electrical ignition system requiring a functional fuse. Locate the fuse box – diagrams are essential for identification – and check for blown fuses if the igniter fails. Common electrical issues include drained batteries or faulty wiring.
Refer to the specific model’s wiring diagrams for detailed component locations and troubleshooting steps. Always disconnect the heater before inspecting or replacing electrical parts.
Fuse Box Diagram & Locations
Dyna-Glo kerosene heaters with electrical components typically house a small fuse box near the control panel or igniter assembly. A detailed diagram illustrating fuse locations and amperage ratings is crucial for safe maintenance.
Consult your specific model’s documentation for the exact location and a clear diagram. Identifying the correct fuse prevents damage and ensures proper operation of the ignition system. Always replace blown fuses with the specified amperage.
Common Electrical Issues & Solutions
Electrical problems in Dyna-Glo heaters often involve the igniter failing to spark or the heater shutting off unexpectedly. Check the fuse first, replacing it if blown with the correct amperage. A faulty igniter may require replacement; ensure it’s properly grounded.
Loose wiring connections can also cause issues – inspect and tighten all connections. If the heater drains the battery (if equipped), investigate for shorts or parasitic draws. Disconnect power before any inspection.
Harley Davidson Dyna Glide Relevance (Cross-Reference)
While seemingly unrelated, Dyna Glide electrical system diagnostics offer a parallel approach to heater troubleshooting. Both involve identifying shorts, faulty wiring, and component failures. Understanding Dyna Glide fuse box diagrams aids in tracing circuits, mirroring heater electrical checks.
The methodical diagnostic process used for motorcycles – isolating issues through testing – translates well to heater maintenance. Applying this mindset can simplify complex heater problems.
Understanding Dyna Glide Electrical Systems (For Component Similarities)
Dyna Glide electrical systems, documented in detailed wiring diagrams, utilize fuses, relays, and wiring harnesses akin to those found in some Dyna-Glo heater models with electrical ignition. Identifying component functions – like ignition control or safety shut-offs – provides a comparative framework.

Analyzing Dyna Glide’s main harness layout can inspire a systematic approach to tracing heater wiring, aiding in pinpointing electrical faults. This cross-referencing enhances diagnostic skills.
Dyna Glide Diagnostic Approaches (Applying to Heater Troubleshooting)
Harley Dyna Glide electrical diagnostic guides emphasize a methodical process: check fuses first, then assess power delivery to components. This parallels heater troubleshooting – verifying the igniter receives voltage, or confirming safety switch functionality.
Employing a multimeter to test continuity and voltage, as practiced on Dynas, translates directly to heater diagnostics. Observing for blown fuses or corroded connections is universally applicable, improving repair efficiency.
Advanced Maintenance
Beyond routine cleaning, advanced maintenance involves inspecting the igniter for wear or damage, ensuring consistent sparking. Carefully check all fuel lines and connections for leaks, addressing any issues immediately to prevent hazards.
A thorough examination of the wick assembly is crucial; look for carbon buildup or deterioration impacting fuel absorption. Regular inspection, mirroring Harley Dyna electrical system checks, ensures optimal heater performance and longevity, promoting safe operation.
Inspecting the Igniter (If Equipped)
Carefully examine the igniter for cracks, corrosion, or damage to the ceramic insulator. A weak or inconsistent spark indicates a failing igniter, requiring replacement for reliable heater operation.
Similar to diagnosing Harley Dyna electrical faults, check wiring connections for looseness or fraying. Ensure proper grounding; a poor ground can hinder ignition. Regular inspection, akin to fuse box checks, maintains safe and efficient heating, preventing frustrating start-up issues.
Checking for Fuel Leaks
Prior to each use, meticulously inspect the fuel tank, fuel lines, and connections for any signs of kerosene leakage. Sniff for fuel odors, as even small leaks pose a fire hazard.
Like diagnosing issues in a Harley Dyna Glide’s fuel system, address leaks immediately. Tighten connections or replace damaged components. A thorough check, mirroring electrical diagnostic guides, ensures safe operation and prevents potential hazards. Never operate the heater with detected leaks; prioritize safety above all else.
Duraheat Kerosene Heater Compatibility
Duraheat kerosene heaters share similarities with Dyna-Glo models, particularly in wick design. Duraheat Dh145 wicks are often compatible replacements for certain Dyna-Glo heaters, like the RMC-95C6B.
However, always verify wick dimensions and specifications before installation. While components may interchange, complete model compatibility isn’t guaranteed. Consider this akin to understanding component similarities within a Harley Dyna Glide’s electrical system – careful matching is crucial for optimal performance and safety.
Duraheat Wick Replacements
Utilizing Duraheat Dh145 wicks as replacements in compatible Dyna-Glo kerosene heaters, such as the RMC-95C6B, can be a cost-effective solution. Ensure the wick’s physical dimensions—length, width, and thickness—precisely match the original Dyna-Glo wick.
Incorrect sizing impacts fuel absorption and flame quality. This parallels the importance of correct component selection when diagnosing a Harley Dyna Glide, where mismatched parts hinder effective repair. Prioritize safety and performance when choosing replacements.
Comparing Dyna-Glo and Duraheat Models
Dyna-Glo and Duraheat both offer kerosene heaters, but differ in features and build quality. Dyna-Glo often includes more advanced controls and higher heat output capacities, while Duraheat models tend to be simpler and more budget-friendly.
Wick compatibility, like diagnosing a Harley Dyna Glide’s electrical system, requires careful attention to detail. Parts interchangeability isn’t guaranteed; always verify specifications before attempting replacements. Consider intended use and budget when selecting a model.
Specific Model: RMC-95C6B
The Dyna-Glo RMC-95C6B is a popular kerosene heater known for its robust heating capacity and user-friendly design. It features multiple heat settings, a large fuel tank for extended runtime, and a safety auto-shutoff system.
Like troubleshooting a Harley Dyna Glide, understanding its components is key. This model’s specifications include a substantial BTU output and a generous tank capacity, making it suitable for larger spaces. Refer to the parts list for replacement components.
RMC-95C6B Features & Specifications
The RMC-95C6B boasts a high BTU output, providing substantial heat for spaces up to 1000 square feet. Its fuel tank holds approximately 1.5 gallons, ensuring prolonged operation. Key features include adjustable heat settings, an automatic shut-off for safety, and a convenient carrying handle.
Similar to diagnosing a Harley Dyna Glide’s electrical system, understanding these specs aids maintenance. The heater’s dimensions and weight are also important considerations for placement and portability.
RMC-95C6B Parts List
Essential replacement parts for the RMC-95C6B include the DH145 wick, compatible with Duraheat models, and the fuel tank cap. Other frequently replaced components are the igniter (if equipped), the fuel filter, and various O-rings for leak prevention.
Like a Harley Dyna Glide’s fuse box diagram, having this list streamlines repairs. Always specify the model number when ordering, ensuring compatibility and proper functionality for optimal heater performance.
Warranty Information
Dyna-Glo heaters are covered by a limited warranty against manufacturing defects, typically for one year from the date of purchase. This warranty doesn’t cover damage from misuse, improper fuel, or lack of maintenance – similar to electrical issues on a Dyna Glide.
For warranty claims or customer support, retain your proof of purchase and contact Dyna-Glo directly. Detailed warranty specifics are available in the product documentation.
Dyna-Glo Heater Warranty Details
The Dyna-Glo heater warranty generally covers defects in materials and workmanship for a period of one year. This excludes normal wear and tear, like wick replacement – akin to brake pad wear on a Dyna Glide. Damage resulting from improper fuel use, modification, or neglect voids the warranty.
Keep your original purchase receipt for proof of date. Contact customer support for claim procedures and specific terms, as they may vary by model.
Contacting Customer Support
For warranty claims, troubleshooting beyond this manual, or parts inquiries, Dyna-Glo customer support is your resource. Similar to diagnosing a Dyna Glide’s electrical system, clear communication is key.
Visit the official Dyna-Glo website for contact information – phone numbers and email addresses are typically provided. Have your model number (like RMC-95C6B) and purchase date ready to expedite assistance. Expect potential wait times during peak seasons.