Proscan TV User Manual: A Comprehensive Guide
Welcome! This manual provides detailed instructions for Proscan televisions, assisting with setup, operation, troubleshooting, and finding necessary replacement parts for your device․
Proscan televisions offer a budget-friendly entry point into modern display technology, providing a range of sizes and features to suit diverse viewing needs․ Often manufactured by RCA, Proscan TVs are widely available and known for their simplicity․ Understanding your specific model is crucial for optimal performance and troubleshooting․
This user manual aims to demystify the Proscan experience, guiding you through initial setup, menu navigation, and common issue resolution․ Identifying the model number – often found on a sticker on the back of the TV (like 32LB30H or 32LB30Q) – is the first step․ This number unlocks access to specific codes for universal remotes (like those from Comcast) and helps locate compatible replacement parts when needed․ Resources like eserviceinfo․com can assist in locating service manuals based on your TV’s serial number․
Understanding Proscan TV Models
Proscan offers a variety of television models, encompassing LCD, DLP, and Plasma technologies, though LCD models are most prevalent today․ Each model, such as the Proscan 32LB30H, possesses unique specifications and features․ Determining your exact model number is paramount for accessing tailored support and compatible parts․
Locating the model number typically involves inspecting a label affixed to the rear of the television․ This label also often includes the serial number, which can be useful when seeking detailed service information․ TVpartsinstock․com emphasizes using the model or board number when searching for replacement components․ Knowing your model allows you to find the correct remote control codes, ensuring seamless operation with universal remotes․ Remember, RCA is often associated with Proscan manufacturing, influencing compatibility and available resources․
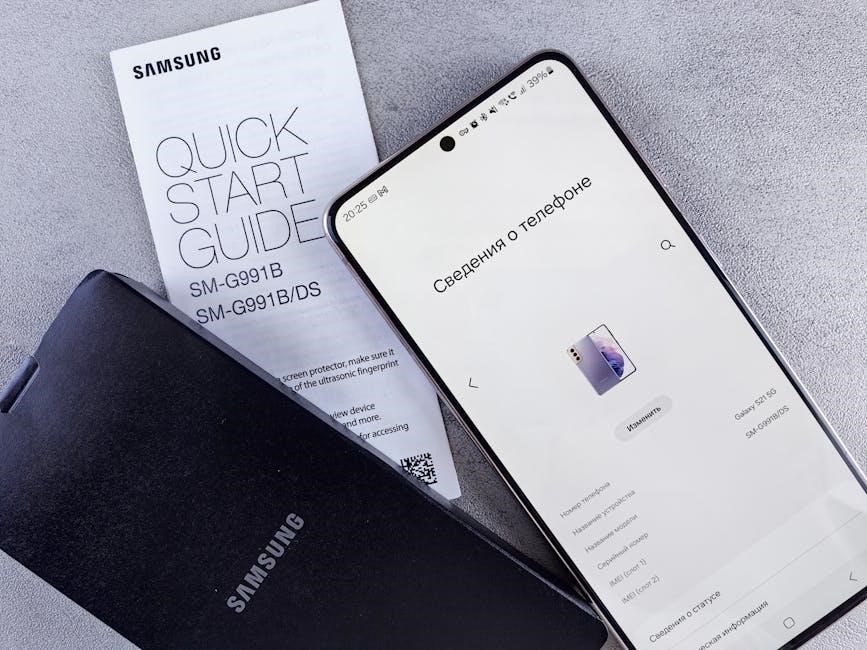
Identifying Your Proscan TV Model Number
Locating your Proscan TV’s model number is crucial for accessing specific support, troubleshooting guides, and replacement parts․ The model number is generally found on a sticker or label located on the back of the television set․ This label often also displays the serial number, providing another identifier for service purposes․
Carefully examine the rear panel; the model number is usually formatted as a combination of letters and numbers (e․g․, 32LB30H, 32LB30Q)․ Websites like eserviceinfo․com may require this number to access detailed service manuals․ If you’re unable to find the label, consult your original purchase documentation or contact Proscan customer support, providing any available serial number information for assistance․ Accurate identification ensures you receive the correct information and parts for your specific TV model․
Setting Up Your Proscan TV
Initial setup of your Proscan TV involves carefully unpacking the unit and positioning it on a stable surface, ensuring adequate ventilation․ Connect the power cord to a grounded outlet, and power on the television using the power button located on the TV itself or the remote control․
Before enjoying your Proscan TV, it’s essential to connect any desired external devices․ This includes connecting HDMI cables for devices like Blu-ray players, gaming consoles, or cable/satellite boxes․ USB ports allow for media playback from compatible storage devices․ Refer to the connection guide for specific port locations and optimal configurations․ Ensure all cables are securely connected for a stable signal and optimal viewing experience․
Initial Setup and Powering On
Unboxing and Placement: Carefully remove your Proscan TV from its packaging, retaining the materials for potential future transport․ Position the TV on a level, stable surface capable of supporting its weight, ensuring sufficient airflow around the unit to prevent overheating․ Avoid direct sunlight or sources of extreme temperature․
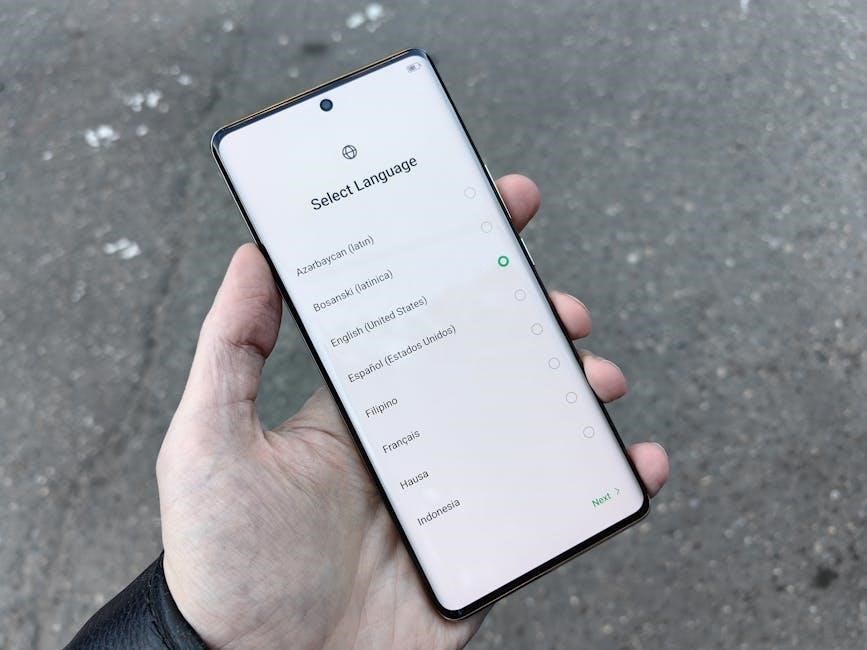
Power Connection: Connect the provided power cord to the TV’s power input and then to a grounded electrical outlet․ Powering On: Press the power button located either on the TV’s chassis or on the remote control․ The TV will initiate its startup sequence, which may take a few moments․ Follow any on-screen prompts for initial configuration, such as language selection and network setup․
Connecting External Devices (HDMI, USB, etc․)
HDMI Connections: Proscan TVs feature HDMI ports for high-definition connections to devices like Blu-ray players, gaming consoles, and cable/satellite boxes․ Use an HDMI cable to connect your device to an available HDMI input on the TV; Select the corresponding HDMI input source using the TV’s remote control․
USB Connectivity: USB ports allow you to connect external storage devices, such as flash drives or external hard drives, to play media files directly on the TV․ Ensure the USB device is formatted in a compatible file system (FAT32 or NTFS)․ Other Connections: Depending on the model, your Proscan TV may also include component, composite, or optical audio outputs for connecting older devices or sound systems․
Navigating the Proscan TV Menu
Accessing the Menu: Press the “Menu” button on your Proscan remote control to display the main TV menu․ Use the arrow keys to navigate through the various options․ The “Enter” or “OK” button selects the highlighted option, while the “Back” or “Exit” button returns you to the previous screen․
Menu Structure: The Proscan TV menu is logically organized into sections such as Picture, Sound, Channel, System, and others․ Each section contains adjustable settings to customize your viewing experience․ Familiarize yourself with the menu layout to quickly access desired features․ Explore each option carefully to optimize your TV’s performance․
Understanding the Main Menu Options
Picture Settings: This section allows adjustment of brightness, contrast, color, sharpness, and picture mode (e․g․, Standard, Vivid, Movie)․ Experiment with these settings to achieve your preferred image quality․ Advanced options may include color temperature and dynamic contrast․
Sound Settings: Control volume, equalizer settings (Bass, Treble), and sound mode (e․g․, Standard, Music, Movie)․ Some models offer surround sound options or audio output settings․ Adjust these to optimize the audio experience for your content․
Channel Settings: Manage channel scanning, program editing, and favorite channels․ This section is crucial for organizing your channel lineup․ System settings include language, time, and parental controls․
Adjusting Picture Settings (Brightness, Contrast, Color)
Brightness controls the overall lightness or darkness of the image․ Increasing brightness makes the picture brighter, while decreasing it makes it darker․ Contrast adjusts the difference between the lightest and darkest parts of the image; higher contrast yields a more vivid picture․
Color settings modify the intensity of the colors displayed․ Adjusting this can make colors more vibrant or muted․ Fine-tuning these settings is subjective and depends on your viewing preferences and the content being displayed․
Experiment with small adjustments to each setting to find the optimal balance for your viewing environment․ Consider using picture presets (Standard, Vivid, Movie) as a starting point․
Adjusting Sound Settings (Volume, Equalizer)
Volume control is straightforward, increasing or decreasing the loudness of the audio․ However, Proscan TVs often include more advanced Sound Settings for a customized listening experience․ The Equalizer allows you to adjust specific frequency ranges – bass, mid-tones, and treble – to tailor the sound to your preference․
Boosting bass can enhance action movies or music, while increasing treble can improve dialogue clarity․ Many models offer preset sound modes like ‘Movie’, ‘Music’, ‘News’, or ‘Standard’ as convenient starting points․ Experiment with these and the equalizer to achieve optimal audio quality․
Consider your room acoustics and the type of content you’re watching when making adjustments․
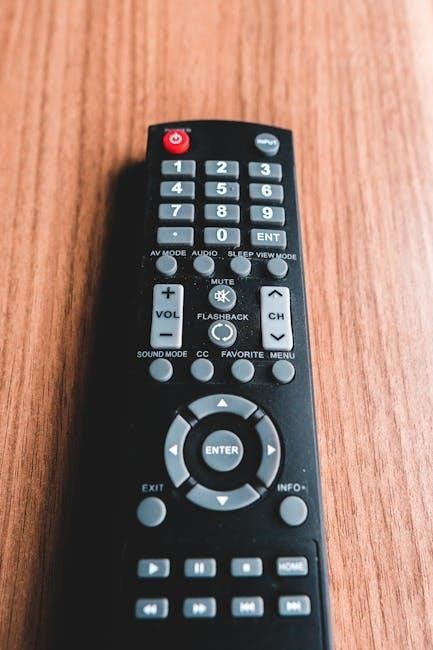
Remote Control Operation
The Proscan remote control is your primary interface for navigating the TV’s features․ Familiarize yourself with the button layout for seamless operation․ Essential buttons include power, volume control, channel selection, menu navigation, and input source selection․
If your original remote is lost or malfunctioning, consider programming a universal remote․ Online resources and your remote’s manual will provide Proscan TV codes for compatibility with various universal remote brands, such as Comcast․ Ensure the remote is correctly paired with your TV model (e․g․, 32LB30Q) for full functionality․
Regularly check the battery compartment and replace batteries as needed to maintain reliable performance․
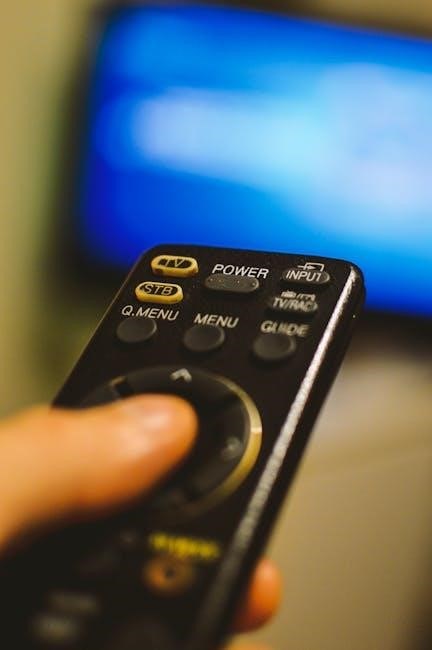
Remote Control Button Functions
Power Button: Turns the television on and off․ Volume Up/Down: Adjusts the audio level․ Channel Up/Down: Cycles through available channels․ Mute: Silences the audio output․ Menu: Accesses the TV’s main menu for settings adjustments․
Input/Source: Selects the desired input source (HDMI, USB, etc․)․ Numeric Keypad: Allows direct channel entry․ Navigation Arrows: Used to navigate menus and on-screen displays․ OK/Enter: Confirms selections within menus․
Other functions may include picture mode selection, sleep timer activation, and closed captioning controls․ Refer to your specific Proscan TV model’s documentation for a complete list of button functions and their corresponding actions․ Proper understanding enhances user experience․
Programming a Universal Remote for Proscan TV
Code Search: Most universal remotes require a setup code specific to your TV brand․ Since RCA manufactures Proscan TVs, begin by trying RCA codes․ Consult your universal remote’s manual for code entry instructions․
Manual Entry: Input the code (e․g․, for Comcast remotes, try codes for RCA) using the remote’s setup buttons․ Test functionality after each code attempt – volume and channel controls are good indicators․ If unsuccessful, try alternative RCA codes or utilize the auto-search function․
Auto-Search: Some remotes automatically scan for compatible codes․ Follow the remote’s instructions, allowing it to cycle through codes until your Proscan TV responds․ Patience is key during this process․ Ensure direct line-of-sight between remotes․
Troubleshooting Common Issues
Common Problems: Proscan TVs, like all electronics, can experience issues․ This section addresses frequent concerns, offering solutions to restore functionality․ Begin by verifying power connections and input sources before proceeding with more complex troubleshooting steps․
Initial Checks: If experiencing issues, ensure the TV is powered on and the correct input source is selected․ A faulty power cord or incorrect input can mimic more serious problems․ Check the remote control batteries as well․
Persistent Issues: For ongoing problems like no picture or sound, consult the dedicated sections below․ If issues persist after attempting these solutions, consider contacting a qualified technician for repair assistance․ Remember to note your Proscan TV model number․
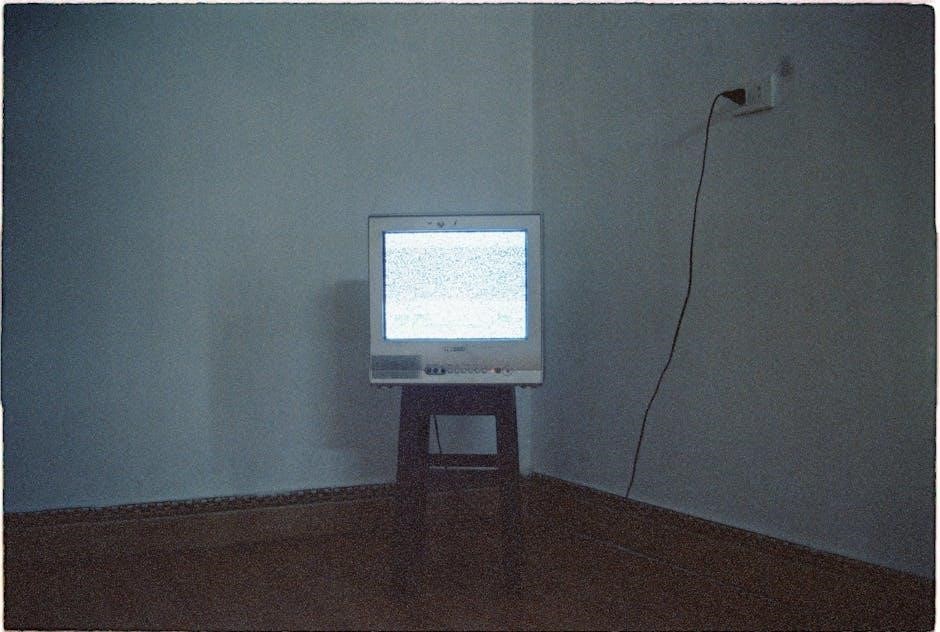
No Picture Issues
Diagnosing a Blank Screen: If your Proscan TV displays a black screen, several factors could be at play․ First, confirm the power cable is securely connected to both the TV and a working outlet․ Next, cycle through all input sources (HDMI, USB, etc․) using the input button on the remote or TV itself, ensuring the correct source is selected․
Brightness & Backlight: Verify the brightness and backlight settings haven’t been accidentally lowered to zero within the picture settings menu․ A dim or non-functional backlight is a common cause of a dark screen․
Further Steps: If the problem persists, try a different HDMI cable or connected device to rule out external issues․ If still unresolved, professional repair may be necessary․
No Sound Issues
Troubleshooting Silent Screens: Experiencing no audio from your Proscan TV can be frustrating․ Begin by checking the volume level, ensuring it isn’t muted or set too low, both on the TV and any connected external devices like cable boxes or DVD players․ Cycle through the sound settings menu to verify the equalizer isn’t configured to eliminate all frequencies․
External Device Check: Disconnect and reconnect any external audio devices (soundbars, headphones) to rule out connection problems․ Test with different audio sources to determine if the issue is specific to one input․
Internal Speaker Test: If using external speakers, try switching to the TV’s internal speakers to see if sound is present․ If not, professional service may be required․
Remote Control Not Working
Addressing Remote Control Failures: If your Proscan TV remote isn’t responding, start with the basics․ Replace the batteries with fresh ones, ensuring correct polarity․ Aim the remote directly at the TV’s infrared sensor, unobstructed by objects․ If you’ve had the remote for a year, as reported by some users, it may simply be failing and require replacement․
Universal Remote Programming: Consider programming a universal remote․ Search online for Proscan TV codes compatible with your Comcast or other universal remote brand․ The code 32LB30Q is reported to work for some models․
Sensor Check: Inspect the TV’s IR sensor for dust or obstructions․ If issues persist, a replacement remote is often the most practical solution․
Proscan TV Parts and Repair
Sourcing Replacement Components: When your Proscan TV requires repair, locating the correct parts is crucial․ TVpartsinstock․com is a valuable resource, offering a 60-day money-back guarantee on in-stock DLP, LCD, and Plasma TV parts․ Utilize their search bar, inputting your PROSCAN TV part number, board number, or complete PROSCAN TV model number for accurate results․
Identifying Part Numbers: Finding the specific part number can be challenging․ eserviceinfo․com may assist in locating serial numbers and related part information․ If you’re unsure, contacting TVpartsinstock․com directly can provide expert assistance․
Repair Considerations: While DIY repair is possible, professional service is recommended for complex issues․

Finding Replacement Parts
Utilizing Online Resources: TVpartsinstock․com stands as a primary source for Proscan TV replacement parts, boasting an extensive inventory of DLP, LCD, and Plasma components․ Their platform offers a 60-day, hassle-free money-back guarantee, ensuring customer satisfaction․ To initiate your search, employ the website’s search bar, meticulously entering either the PROSCAN TV part number, the board number, or the complete PROSCAN TV model number․
Leveraging Serial Numbers: If the exact part number remains elusive, eserviceinfo․com can prove invaluable․ This resource may help you uncover the necessary serial number information, which can then be used to pinpoint the correct replacement part․
Direct Assistance: Don’t hesitate to contact TVpartsinstock․com directly for personalized support․
Resources for Proscan TV Repair
Online Forums and Communities: Fixya serves as a valuable online platform where users share solutions to common Proscan TV issues․ Searching within Fixya’s database, using your specific model number (like 32LB30H), can reveal previously solved problems and potential repair strategies․ User-submitted answers often provide practical, step-by-step guidance․
Eserviceinfo․com: This website is a potential resource for locating service manuals and schematics, which are crucial for more complex repairs․ Access to these documents can empower technically inclined individuals to diagnose and address issues independently․
Professional Repair Services: For repairs beyond your skillset, consider contacting a qualified television repair technician․
Proscan TV Specifications (Based on Common Models)
Display Resolution and Screen Size: Proscan televisions are available in a range of sizes and resolutions․ Common models, such as the 32LB30H LCD TV, typically offer a 720p (HD) resolution․ Screen sizes vary considerably, from compact 24-inch models to larger 55-inch or 65-inch displays, catering to diverse viewing preferences and room dimensions․
Connectivity Options: Proscan TVs generally include essential connectivity ports․ These commonly feature HDMI inputs for connecting high-definition devices like Blu-ray players and gaming consoles․ USB ports allow for media playback from external storage devices․ Additionally, many models incorporate component and composite video inputs for compatibility with older devices․

Display Resolution and Screen Size
Proscan televisions exhibit a diverse range of display resolutions and screen sizes, designed to accommodate various viewing needs and spatial constraints․ Frequently encountered models, like the Proscan 32LB30H LCD TV, commonly feature a 720p High Definition (HD) resolution, delivering a clear and detailed picture․ However, newer Proscan models may offer Full HD (1080p) or even 4K Ultra HD resolutions for enhanced visual fidelity․

Screen sizes span a considerable spectrum, starting from compact 24-inch options ideal for smaller rooms or secondary viewing areas, extending to larger 55-inch, 65-inch, and even 75-inch displays suitable for immersive home theater experiences․ Selecting the appropriate screen size depends on viewing distance and personal preference․
Connectivity Options
Proscan televisions generally offer a variety of connectivity options to accommodate diverse external devices․ Commonly found ports include HDMI inputs, essential for connecting high-definition sources like Blu-ray players, gaming consoles, and streaming devices․ USB ports enable media playback from flash drives or external hard drives, providing convenient access to stored content․
Older Proscan models might also feature component and composite video inputs for compatibility with legacy devices․ Furthermore, many Proscan TVs incorporate an optical audio output for connecting to soundbars or home theater receivers, enhancing the audio experience․ Some models may even include a coaxial cable input for antenna connections, allowing access to over-the-air broadcasts․