Tile roof installation demands careful planning and execution; this guide offers essential insights for a successful project, referencing DECRA Roofing Systems’ Villa Tile profile.
Understanding the nuances of tile systems, from Portuguese-style clay to stone-coated steel, is crucial, as highlighted by FRSA/NTRMA consensus installation guidelines.
Understanding Tile Roofing Systems
Tile roofing systems encompass diverse materials – clay, concrete, and metal – each with unique characteristics impacting installation. The DECRA Villa Tile profile, a stone-coated steel option, requires specific lapping procedures detailed in their installation guides.
Portuguese-style clay tiles, traditionally used, necessitate careful ventilator placement, typically avoiding removal of tiles higher than the third row from the ridge. FRSA/NTRMA guidelines emphasize linear coverage adjustments, acknowledging variations of 3-6mm between tiles, crucial for proper overlap and weather resistance.
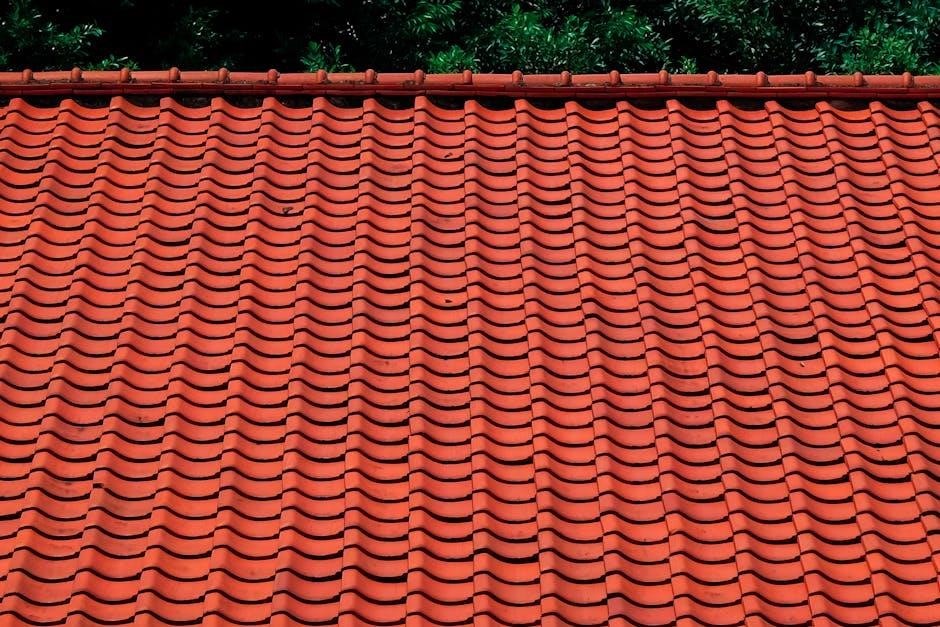
These systems rely on interlocking or overlapping designs for water shedding.
Benefits of Tile Roofs
Tile roofs offer exceptional longevity, often outlasting other materials, providing decades of reliable protection. Stone-coated steel tiles, like DECRA’s Villa profile, combine durability with lighter weight, easing structural demands.
Aesthetically, tile provides a classic, high-end appearance, enhancing property value. Proper installation, guided by FRSA/NTRMA standards, ensures weather resistance and minimizes maintenance.
Portuguese clay tiles offer traditional charm, while effective ventilation, crucial for all tile types, prevents moisture buildup and extends roof lifespan.
Planning Your Tile Roof Installation
Careful planning is vital, encompassing local building codes, permit acquisition, and precise material calculations, referencing guidelines from FRSA/NTRMA and DECRA Roofing Systems.
Local Building Codes and Permits
Prior to commencing any tile roof installation, thoroughly investigate and adhere to all local building codes and regulations. Obtaining the necessary permits is absolutely crucial for legal compliance and avoiding potential fines or project delays.
These codes often dictate specific requirements for roof pitch, underlayment materials, fastening methods, and ventilation. Contact your local building department to ascertain the precise regulations applicable to your project. Failure to comply can lead to costly rework and potential safety hazards, so diligent research is paramount.
Choosing the Right Tile Material
Selecting the appropriate tile material is fundamental to a durable and aesthetically pleasing roof. Options range from traditional clay tiles, like those in Portuguese-style roofs, to modern stone-coated steel tiles such as DECRA’s Villa Tile profile.
Consider factors like climate, budget, and architectural style. Clay offers classic beauty, while steel provides lightweight durability. FRSA/NTRMA guidelines emphasize proper material selection for optimal performance. Evaluate linear coverage adjustments, as some tiles allow for minor variations.
Calculating Tile Quantity and Waste
Accurate tile quantity calculation minimizes material costs and project delays. Begin by determining the roof’s total area, then account for overlaps and cuts. FRSA/NTRMA guidelines highlight the importance of precise measurements.
Factor in waste – typically 5-10% – for breakage and fitting. DECRA tiles, and others, often have slight linear coverage adjustments (3-6mm) impacting overall quantity. Careful planning, referencing a tile installation guide, ensures sufficient materials are ordered.

Tools and Materials Needed
Successful tile installation requires essential hand tools, power tools for cutting, and robust safety equipment, as detailed in comprehensive roofing guides.
Proper tools ensure efficient and safe tile placement, adhering to standards outlined by organizations like FRSA/NTRMA.
Essential Hand Tools
Tile installation necessitates a selection of fundamental hand tools for precision and control. A chalk line is vital for establishing straight courses, ensuring a visually appealing and structurally sound roof.
A utility knife proves invaluable for trimming underlayment and cutting sealant. Measuring tapes, both short and long, are crucial for accurate layout and tile spacing.
Tin snips facilitate precise metal flashing cuts, while a hammer, ideally with a rubber mallet head, aids in gentle tile adjustments. Gloves protect hands, and safety glasses are non-negotiable for eye protection throughout the process.
Power Tools for Tile Installation
While hand tools are essential, power tools significantly expedite tile roof installation. A circular saw with a diamond blade is paramount for efficiently cutting tiles, especially for complex angles and shapes.
A reciprocating saw proves useful for trimming fascia boards and making precise cuts in challenging areas.
Power drills, equipped with appropriate bits, are necessary for fastening tiles securely. Consider a pneumatic roofing nailer for faster fastening, but always prioritize safety and proper technique when utilizing these tools.
Safety Equipment
Tile roof installation demands rigorous safety precautions. A full-body harness, securely anchored to a stable point, is non-negotiable to prevent falls.
Wear sturdy, non-slip roofing boots to maintain secure footing on sloped surfaces.
Hard hats are crucial for protecting against falling debris, and safety glasses shield eyes from dust and fragments. Gloves protect hands during handling of tiles.
Hearing protection is advisable when using power tools, and appropriate clothing offers sun protection.
Roof Preparation
Roof deck inspection is paramount, ensuring structural integrity before tile application. Proper underlayment installation creates a waterproof barrier, vital for longevity.
Confirming adequate roof pitch is essential for effective water runoff.
Inspecting the Roof Deck
Prior to tile installation, a thorough roof deck inspection is absolutely critical. Examine the sheathing for any signs of rot, water damage, or weakness.
Replace any compromised sections with new, appropriately graded plywood or OSB, ensuring secure fastening. Verify that the deck is adequately fastened to the rafters, eliminating any movement or deflection.
Confirm the deck is clean, dry, and free of debris. A solid, stable deck is the foundation for a durable and long-lasting tile roof.
Underlayment Installation
Following a successful roof deck inspection, proper underlayment installation is paramount for weather protection. Overlap seams by a minimum of six inches, ensuring a watertight barrier against potential leaks.
Secure the underlayment with corrosion-resistant fasteners, spaced according to manufacturer specifications. Consider using a synthetic underlayment for enhanced durability and tear resistance.
Pay close attention to detail around penetrations and valleys, providing an extra layer of protection. A correctly installed underlayment safeguards the roof deck.
Establishing Proper Roof Pitch
Maintaining the correct roof pitch is critical for effective water runoff and preventing tile dislodgement. Tile roofs generally require a minimum pitch, varying by tile type and local codes.
Verify the pitch using a level and measuring tape, ensuring consistency across the entire roof surface. Insufficient pitch can lead to water ponding and premature tile failure.
Adjust framing as needed to achieve the specified pitch, prioritizing proper drainage. Accurate pitch establishment is fundamental for a long-lasting, watertight tile roof.

Tile Installation Process
Begin with the first course, carefully lapping and interlocking tiles for a secure fit. Cut tiles precisely for edges, and expertly install ridge and hip tiles.
Starting the First Course
Properly establishing the initial tile course is paramount for a structurally sound and aesthetically pleasing roof. Begin at the lowest edge, ensuring a perfectly straight and level starting point.
Carefully position the first tile, aligning it with the eave and ensuring correct overhang. Subsequent tiles should overlap, sliding under the preceding tile – a crucial lapping procedure for DECRA Villa Tile.
Maintain consistent alignment throughout this initial course, as it dictates the layout for the entire roof. This foundational step requires precision and attention to detail for optimal results.
Lapping and Interlocking Tiles
Effective lapping and interlocking are fundamental to a weatherproof tile roof. Lift the front edge of each tile and slide the next tile down, ensuring it laps under the preceding one, shielding against water penetration.
This technique, vital for DECRA Villa Tile profiles, creates a robust, overlapping system. Interlocking features, if present, must engage securely, providing additional resistance to wind uplift and driving rain.
Consistent lapping prevents water intrusion and maintains the roof’s structural integrity, demanding careful execution throughout the installation process.
Cutting Tiles for Fitting
Precise tile cutting is often necessary around roof features like chimneys, vents, and edges. Utilize appropriate cutting tools – manual tile cutters or power saws with diamond blades – to achieve clean, accurate cuts.
Always measure carefully and account for the tile’s overlap when determining cut lines. Smooth edges prevent damage and ensure a proper fit.
Minimize dust during cutting, and wear safety glasses. Proper cutting maintains the roof’s aesthetic appeal and watertight seal, crucial for long-term performance.
Installing Ridge and Hip Tiles
Ridge and hip tiles cap the roof’s peaks, providing a finished look and crucial weather protection. Begin by installing underlayment along the ridge or hip line, ensuring a watertight base.
Carefully position the first ridge or hip tile, overlapping it appropriately with the adjacent field tiles. Secure with fasteners, following manufacturer’s recommendations for placement and depth.
Maintain consistent alignment and overlap throughout the installation, creating a visually appealing and durable roof ridge or hip.
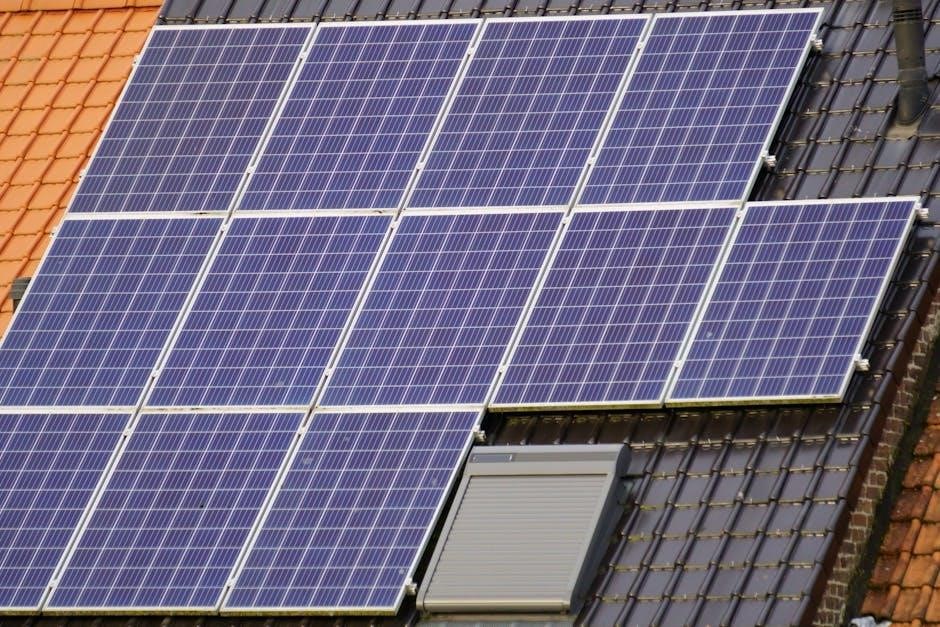
Ventilation and Flashing
Proper roof ventilation prevents moisture buildup, extending roof life. Flashing around chimneys and vents ensures watertight seals, vital for preventing leaks.
Ventilator placement requires careful tile removal, typically no higher than the third row from the ridge.
Proper Roof Ventilation Techniques
Effective roof ventilation is paramount for longevity, preventing moisture accumulation that leads to structural damage and mold growth. Tile roofs, due to their inherent design, require specific ventilation strategies.
Adequate intake vents at the eaves, combined with exhaust vents near the ridge, create crucial airflow. This continuous circulation removes warm, moist air during warmer months and prevents ice damming in colder climates.
Careful consideration must be given to ventilator placement, often involving the removal of tiles – typically, it’s advised not to remove tiles higher than the third row down from the ridge tile.
Flashing Around Chimneys and Vents
Proper flashing is critical around roof penetrations like chimneys and vents, preventing water intrusion and ensuring a watertight seal. Tile roofs demand meticulous flashing details due to the overlapping nature of the tiles.
Step flashing, integrated with counter flashing, is commonly used around chimneys, creating a layered defense against water. Vent flashing requires careful sealing to prevent leaks, often utilizing rubber boots or specialized tile flashing.
All flashing materials must be compatible with the tile and roofing underlayment, ensuring long-term performance and preventing corrosion.
Valley Installation
Valley installation on a tile roof requires specific techniques to manage water flow and prevent leaks. Open valleys, utilizing metal flashing, are a common approach, allowing water to run freely over the metal.
Closed valleys, where tiles interlock across the valley, demand precise cutting and fitting to ensure a watertight seal. Proper underlayment is crucial in valleys, providing an extra layer of protection.
Careful attention to detail and accurate flashing are essential for long-lasting valley performance, preventing water damage to the roof structure.
Fastening Methods
Fastening tiles involves choosing between nails or screws, prioritizing proper placement for secure attachment and longevity, while considering fastener corrosion resistance.
Nail vs. Screw Fastening
Selecting between nail and screw fastening depends on several factors, including local building codes, tile material, and roof deck composition. Nails are traditionally used, offering quicker installation, but screws generally provide superior holding power, especially in high-wind areas.
Screws are less prone to loosening over time and are recommended for challenging climates or heavier tile types. However, improper screw installation can damage tiles, so pre-drilling is often necessary. Always consult manufacturer specifications for recommended fastening methods and materials to ensure warranty compliance and optimal roof performance.
Proper Fastener Placement
Accurate fastener placement is critical for a secure and long-lasting tile roof. Fasteners should penetrate the tile and securely anchor into the roof deck, typically through the tile’s nailing shelf or designated fastening points.
Avoid over-driving fasteners, which can crack tiles, and ensure consistent spacing according to manufacturer guidelines. Proper placement also considers wind uplift resistance; strategic fastener patterns enhance the roof’s ability to withstand strong winds. Always adhere to local building codes regarding fastener density and placement requirements.
Fastener Corrosion Resistance
Selecting fasteners with superior corrosion resistance is paramount for tile roof longevity. Exposure to weather elements necessitates using materials like stainless steel or hot-dipped galvanized steel, preventing rust and maintaining structural integrity.
Consider the climate; coastal regions demand higher corrosion resistance. Regularly inspect fasteners for signs of corrosion, and replace any compromised ones promptly. Utilizing compatible materials—fasteners and tile—minimizes galvanic corrosion, further extending the roof’s lifespan.
Dealing with Specific Roof Features
Installing around skylights, dormers, and roof transitions requires precise cutting and flashing techniques, ensuring watertight seals and maintaining aesthetic appeal.
Careful planning and execution are vital for these complex areas, as detailed in comprehensive installation guides.
Installing Tiles Around Skylights
Skylight installation within a tile roof necessitates meticulous detailing to prevent leaks and maintain structural integrity. Begin by carefully flashing the skylight opening, extending the flashing at least 6 inches onto the roof deck.
Cut tiles to precisely fit around the skylight frame, ensuring a snug but not overly tight fit. Utilize appropriate tile cutting tools for clean, accurate cuts.
Properly lap and interlock the cut tiles with adjacent rows, maintaining the roof’s weather resistance. Seal any gaps with high-quality roofing sealant, following manufacturer’s instructions.
Working with Dormers
Dormer installation requires careful attention to detail, ensuring seamless integration with the main roof structure. Begin by properly flashing the dormer’s base, extending the flashing onto the roof deck and side walls.
Cut tiles to fit the dormer’s unique angles and curves, prioritizing precision for a watertight seal. Maintain consistent lapping and interlocking patterns around the dormer’s edges.
Pay close attention to the transition between the dormer roof and the main roof, ensuring proper flashing and tile alignment for long-term weather protection.
Addressing Roof Transitions
Roof transitions, where roof planes intersect, demand meticulous flashing and tile work to prevent leaks. Begin by installing continuous flashing, extending upwards onto the adjacent roof plane, creating a waterproof barrier.
Carefully cut tiles to conform to the transition’s angle, ensuring proper overlap and secure fastening. Maintain consistent lapping patterns, mirroring the main roof installation.
Prioritize a smooth, integrated appearance, blending the transition seamlessly with the surrounding tile field, guaranteeing long-term durability and aesthetic appeal.
Troubleshooting Common Issues
Tile roof problems, like broken tiles or leaks, require prompt attention; misaligned tiles should be carefully reset, while damaged ones necessitate replacement for lasting protection.
Dealing with Broken Tiles
Broken tiles are an inevitable part of any roof’s lifespan, often due to impact or weathering. Immediate replacement is crucial to prevent water intrusion and further damage. Carefully remove the damaged tile, noting its position for accurate replacement.
Ensure the new tile matches the existing profile and color. When installing, gently slide it into place, securing it with appropriate fasteners. Always handle tiles with care to avoid causing further breakage during the repair process, maintaining the roof’s integrity.
Addressing Water Leaks
Water leaks in tile roofs often stem from damaged underlayment, compromised flashing around chimneys or vents, or broken/dislodged tiles. Thoroughly inspect the area above the leak, checking for visible damage. Prioritize identifying the source before attempting repairs.
Repairing flashing or replacing damaged underlayment may require professional assistance. Ensure proper ventilation to prevent condensation buildup, a common cause of leaks. Promptly address any issues to avoid extensive water damage and maintain the roof’s protective barrier.
Correcting Misaligned Tiles
Misaligned tiles compromise the roof’s aesthetic appeal and can lead to water intrusion. Carefully lift the affected tile and inspect the underlying area for obstructions or unevenness. Ensure proper lapping and interlocking with adjacent tiles during re-installation.
If fasteners are loose or corroded, replace them with appropriate, corrosion-resistant alternatives. Minor adjustments may be needed to achieve a flush, even surface. Consistent alignment throughout the roof is vital for both appearance and long-term performance, referencing DECRA guidelines.

Tile Roof Maintenance
Regular inspections, cleaning, and prompt repair of minor damage are vital for extending a tile roof’s lifespan, ensuring lasting protection and aesthetic value.
Regular Inspections
Consistent roof inspections are paramount for identifying potential issues early, preventing costly repairs. Inspect after storms for dislodged, cracked, or broken tiles, and check flashing around chimneys and vents.
Look for signs of moss or algae growth, which can retain moisture and damage tiles over time. Examine fastener points for corrosion, and assess the condition of underlayment if visible.
Document findings with photos and address concerns promptly to maintain the roof’s integrity and longevity, referencing installation guidelines when needed.
Cleaning and Moss Removal
Regular cleaning prevents debris buildup that can trap moisture and promote moss growth, compromising tile integrity. Gently remove leaves, branches, and other organic matter with a soft brush or blower.
For moss removal, avoid harsh chemicals or abrasive cleaners that could damage the tile surface. Consider specialized moss removal solutions designed for roofing materials, applying them carefully.
Always prioritize safety when working at heights, and consult installation guides for specific tile cleaning recommendations to preserve the roof’s appearance and lifespan.
Repairing Minor Damage
Promptly address minor tile damage to prevent escalation. Replace cracked or broken tiles with matching replacements, ensuring proper lapping and fastening according to installation guidelines.
For small chips or blemishes, specialized tile repair compounds can offer cosmetic fixes. Inspect fasteners regularly, tightening or replacing corroded ones to maintain secure tile attachment.
Refer to the tile manufacturer’s recommendations and FRSA/NTRMA guidelines for appropriate repair techniques, safeguarding the roof’s weather resistance and longevity.
DECRA Roofing Systems Villa Tile Profile Installation
Installation of DECRA Villa Tile requires following provided instructions and drawings as a guide, ensuring proper lapping and sliding of tiles along the roof.
Specific Guidelines for DECRA Tiles
DECRA Villa Tile profiles necessitate a unique approach to installation, differing from traditional tile methods. The provided guide emphasizes lifting the front edge of each tile and sliding the subsequent tile into place, ensuring a secure lap underneath the preceding one.
This lapping procedure, consistently applied across the roof surface, is paramount for weather resistance. Always refer to the official installation manual for detailed diagrams and specifications, as these tiles require precise alignment for optimal performance and longevity.
Lapping Procedures for DECRA Tiles
Proper lapping is fundamental when installing DECRA Villa Tile. The installation guide instructs to slide each tile down to lap under the top tile, working systematically across the roof. Maintaining consistent lapping, with the laps facing away from prevailing weather, is critical for preventing water ingress.
Ensure each tile interlocks securely with its neighbor, creating a watertight seal. Deviations from recommended lapping procedures can compromise the roof’s integrity, so strict adherence to the manufacturer’s specifications is essential for a durable, long-lasting installation.
Portuguese-Style Clay Roof Installation
This guide details installing Portuguese-style clay roofs, emphasizing reading the complete instructions before starting; proper ventilator placement requires removing tiles from the third row.
General Installation Recommendations
Installation necessitates a thorough reading of the provided guide before commencing work, ensuring complete comprehension of all procedures and safety precautions; Careful planning is paramount for a durable and aesthetically pleasing result.
Prior to tile placement, verify the roof deck’s structural integrity and ensure proper underlayment application for moisture protection. Precise alignment and consistent lapping are vital, working along the roof with tiles overlapping correctly.
Remember to account for linear coverage adjustments, typically around 3 to 6mm, inherent in most roofing tiles, and always adhere to local building codes.
Ventilator Placement on Clay Tile Roofs
Strategic ventilator positioning is crucial for maintaining optimal roof health and preventing moisture buildup. Select desired locations on the roof, carefully considering airflow and aesthetic balance.
To accommodate ventilators, remove tiles, but it’s strongly advised to limit removal to the third row down from the ridge tile. Removing higher tiles can compromise structural integrity.
Ensure proper sealing around the ventilator base to prevent water intrusion, and always follow the manufacturer’s specifications for installation and flashing details.

FRSA/NTRMA Tile Installation Guidelines
FRSA/NTRMA developed consensus guidelines in 1987 for proper tile installation, addressing linear coverage adjustments—typically 3 to 6mm—for optimal performance.
Consensus Guidelines for Tile Installation
In January 1987, the Roof Tile Committee of the FRSA/NTRMA embarked on a crucial mission: to formulate and document comprehensive, consensus-based guidelines for the correct installation of roofing tiles.
These guidelines represent a collaborative effort, aiming to standardize practices and ensure long-lasting, reliable roof systems. They cover various aspects, from proper fastening techniques to addressing specific roof features, promoting quality and durability within the industry. Adherence to these standards is highly recommended.
Linear Coverage Adjustments
Most roofing tiles aren’t perfectly uniform; they exhibit slight variations in their linear coverage – the distance a tile spans from side to side. Typically, this adjustment range falls between 3 to 6 millimeters.
Acknowledging and accounting for this inherent variability is vital during installation. Skilled installers strategically manage these minor discrepancies to achieve a visually appealing and structurally sound roof, ensuring proper overlap and weather resistance.